Starting in 2008, Bridgeview has reordered the holes on the course. Now you start on what used to be no. 6 – so the order is 6-7-8-9-1-2-3-4-5. Entrance is now at the driving range.
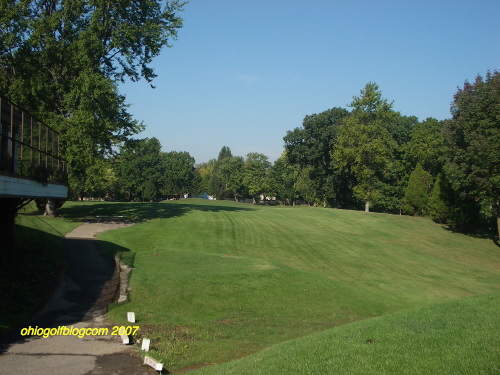
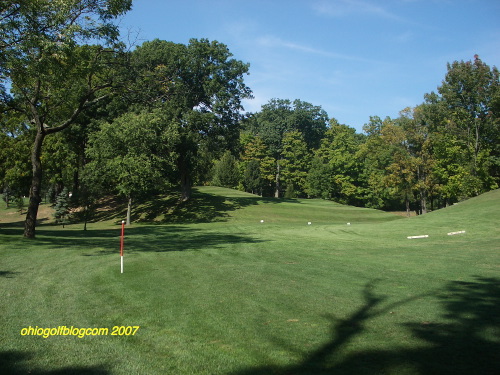
Bridgeview’s par 4 number 1 from the tee
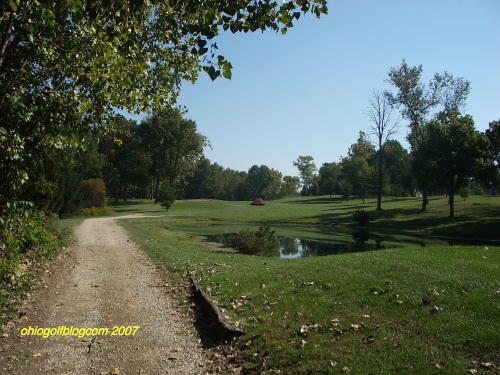
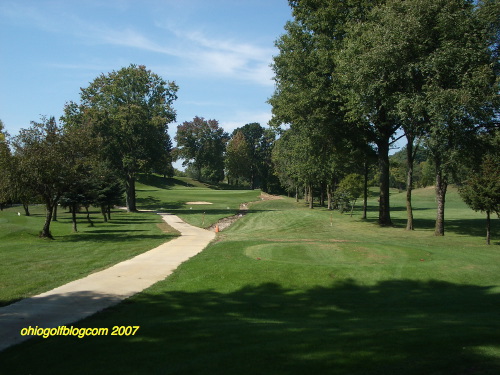
Bridgeview golf course greets you with a 308 yard par 4 first hole but don’t be fooled into thinking you can drive it or be guaranteed a birdie because of its short length. The first hole at Bridgeview sets the stage for a recurring theme: position. If you don’t position your tee shot, the relatively short first hole will have you on your knees begging for bogey.
Looking from the tee, you are faced with a 90 degree dogleg right immediately before the hole. Towering trees on the right and in front of the hole, stand ready to swat down any attempt to shortcut the hole. A hilly fairway with a valley at about 125 yards from the hole almost guarantees an awkward stance for your second shot. Finding a level lie for your second shot requires a 225 yard bullseye to a concave dartboard of a landing area. Compounding the problem is that the fairway ends at about 240 yards from the tee. A mound behind the fairway attempts to stop those shots that result from overclubbing or being struck with a little too much first tee bravado. If not, a chain link fence is the last resort before going o.b. and re-teeing.
First Green at Bridgeview
If, after your first shot, you find you have an angle to the green, you still face a severely sloped green from back to front that will make putting a many-stroked nightmare if you go beyond the flag. Take note of the pin placement and allow for some roll because this green is usually anything but soft to approach shots.
High risk – high reward shot: fade around the corner leading to an easy chip or jail in the trees.
Conservative approach – Drive down the middle or to the left leading to 60 – 115 yard approach.
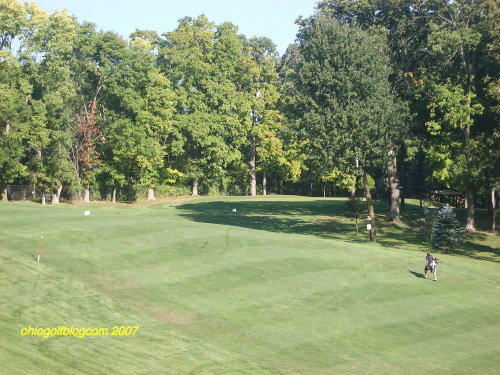
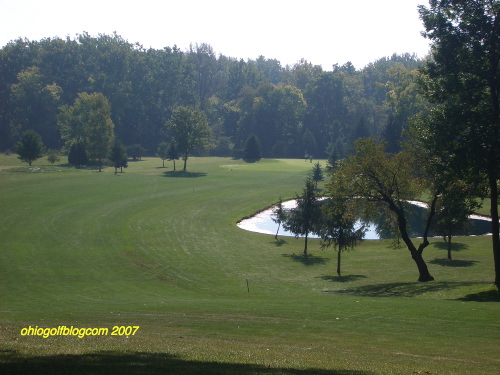
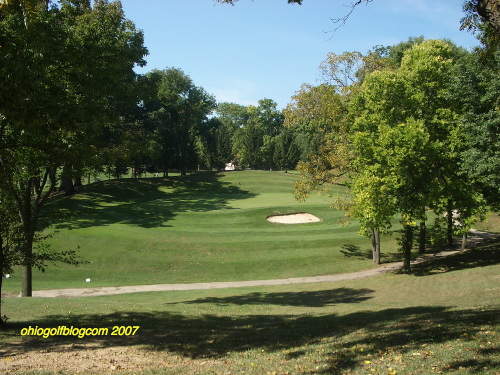
Par 5 second hole at Bridgeview
Hole 2 is a slight dogleg right par 5, 490 yards. about 200 yards from the hole is a long downhill slope connecting to the lower fairway. From the tee, the fairway goes slightly downhill then crests at about 325 yards from the hole and then runs downhill with a slight left to right bias. Most tee shots will kick hard right bringing a group of trees at the slight dogleg into play and preventing a go at the green. The best shot from the tee would be to the left side of the fairway or just in the rough at the left of the fairway. This area usually gives a level stance and an excellent angle into the green from atop the hill overlooking the second half of the hole. The change in elevation results in your second shot playing much shorter than the 200-250 yards claimed. A large green awaits and is very receptive to a fairway wood approach. A bunker at the front right of the green offers little protection to a hole that should play just under its par 5 rating.
High risk – low reward shot: Driver off the tee usually results in being caught on the downslope between the two fairways and in the rough, or in the trees to the left or right of the hole. If you hit the second fairway, you lose the great view from above as well as the change in elevation’s boost to your second shot.
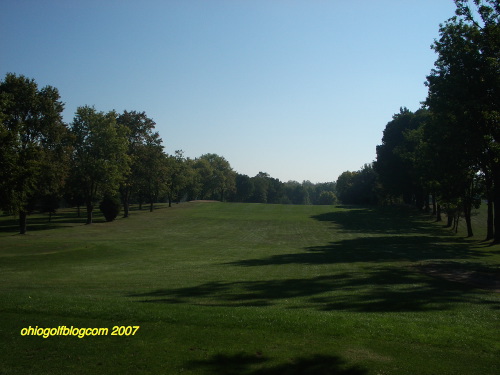
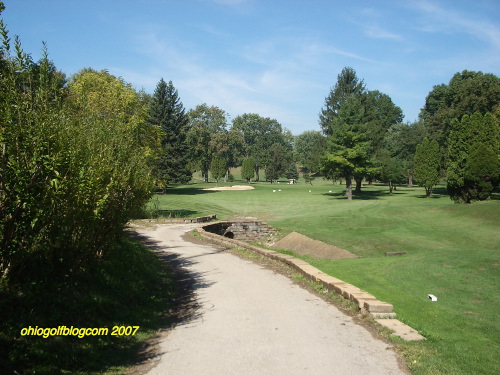
Par 4 third hole at Bridgeview
Bridgeview’s third is an uphill, 367 yard par 4 that bends slightly from right to left. Slicer’s beware – the tee box attempts to aim you well right of the best path for this hole towards three fairway bunkers. If you do find the fairway, the landing area for your tee shot slopes from left to right, and most tee shots will take a hard bounce to the right as a result. Your second shot will be to a slightly elevated green with a bunker in the front right and mounds to the left and rear. Be warned that the hole plays much shorter than the yardages given from the fairway. If the pin is in the front, most putts will break towards the pond on the fourth hole.
Ideal shot off the tee is a fairway metal draw that follows the curvature of the fairway.
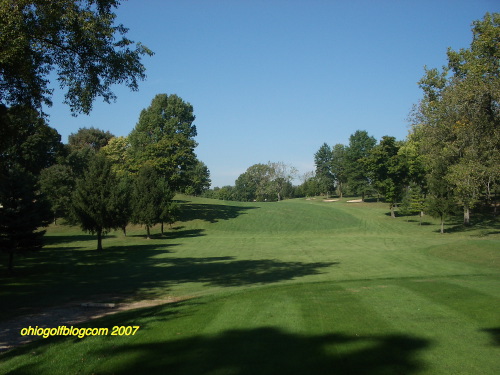
Bridgeview’s par 5 fourth hole
Hole 4 has to be Bridgeview’s signature hole as it stresses the course’s theme: position golf. An anything but straightforward 538 yard par 5 that carries the number 1 handicap. Players tee off over a small pond and towards a narrow opening in the trees some 300 yards off. From there the fairway drops 40-50 feet and turns to the right. A second pond begins soon after the trees end on the right. Fairway bunkers guard the left side at 150 and 100 yards from the green.
From the tee, a large boulder sits smack in the middle of the fairway some 150 yards out like a stop sign intending to make you pause and reflect upon your options. Ignoring it and mindlessly pulling out a driver and banging at the opening generally will bring the trees to the right in play and may have you flirting with the out of bounds stakes. Or it may well have you digging out of a fairway bunker to the left on your second. If you do manage to connect well with your driver and simultaneously place it along the left side of the fairway, you still will be left with a well-nigh impossible downhill, side-hill, 250 yard slice to bring it around the trees and to the green yet still avoid the hole’s second pond on the right. Hit the dreaded straight ball and you’ll find yourself out in the neighboring field searching for your wayward white sphere.
Bridgeview’s fourth from the bend
Your better option is to take a fairway metal and play down the left side off the tee, well short of the fairway bunker. Pull out an iron on your second and coax your ball down the hill near the 150 marker. Resist the temptation to take it over the trees and pond. After you have positioned yourself there, find the flag placement on the enormous green and calculate your yardage wisely. Hitting the green isn’t enough as you could still face a 30-40 yard putt.
Bridgeview is in the process of making the green much smaller as it has reduced its size by about 1/2.
Bridgeview’s fifth hole
Holes 5 and 6 offer a change from the up and down and side to side roller coaster ride that is Bridgeview. The fifth is the opposite of the first, a par 4, 90 degree dogleg left but without the hills. Again, towering trees guard the green to the left, and straightaway off the tee, the fairway ends at about 235 yards. A judicious approach suggests playing the ball to the right side to avoid the overhanging limbs and leaving yourself about a 100 yard second. If you have a low hook in your bag of tricks, you may want to gamble and play around the corner, leaving yourself an easy 30 yard chip to the green. When choosing your options, remember that the fifth’s green is the hardest and fastest on the course. Whether your approach is from 100 or 30, land it short of the green and let it bounce on and roll to the hole. A full shot to the green often ends up on the banks of Alum Creek.
Bridgeview’s par 3 number 6
Number 6 is a short par 3 of allegedly 140 yards. The tee box is nestled into a hill, tucked under the overpass, and protected from the wind. A bunker guards the front left of the green and tall evergreens may come into play if the flag is on the right. Any right side flag position also requires putting on the turtle’s back. Three and even four putts are likely especially after coming off the fifth’s hard and fast putting surface.
 Bridgeview’s par 4 seventh
After the brief respite of the fifth and sixth, the par 4 seventh gets you back on the roller coaster. The seventh fairway is a valley between holes 9 and 8. A fade off the tee will hit the side of the eighth hole and, if the hillside proves generous, it will return the ball to the seventh fairway but don’t count on it. At 150 yards from the hole, the fairway opens up to the left to catch a slightly overcooked draw and some lesser hooks. Straightaway the fairway ends at about 275 yards from the tee and becomes manageable rough. The best angle is from the left side of the fairway to the flag. The seventh boasts an elevated green that proves impregnable to any but the well struck approach. Make your best determination of where the flag is by how much of it you can see and try to leave your second short of the hole. Putting back down
from behind the flag may leave you making your second putting stroke with a wedge.
The seventh’s green
Smart play – if you get stuck on the right-side hill in the rough play back to the fairway instead of going for the green.
Bridgeview’s par 4 eighth hole
Trek up the hill to the eighth tee and find yourself facing one of the best tests of driving accuracy and positioning your ball. The par 4 eighth hole, like the second and fourth before it, has a dramatic drop in elevation awaiting your second shot. You can try to take a driver and bomb it over the hill but more often than not the rough separating the upper and lower parts of the fairway will catch your ball on a drastic sidehill lie. The alternative is to throw a dart from the tee that sticks next to the lonely tree at the edge of the hill (Bridgeview has since removed the tree).
Bridgeview’s eighth hole – looking to the green from the hill
Hit it too far right and the pit in the right side of the fairway catches your ball leaving you with a sidehill lie in the rough. Go too far left and the slope of the hill and/or cartpath grabs your ball and sends it reeling to the downhill slope between the upper and lower tiers of the fairway. Catch the small level areas to either side of the lone tree and enjoy the opportunity to hit a soaring short iron from the top of the hill to an expansive green.
Bridgeview’s par 3 ninth hole
The ninth challenges you with a mid to short iron to an elevated green built into the side of a hill and requires a very high and soft landing shot. The green of this par 3 is slightly turned to its side and leaves you shooting at what would normally be its right side. Because of this, you are left trying to hit a long skinny neck of putting surface which often results in your shot rolling off the green, resting in the rough to the left of the hole and leaving you with a downhill chip back to the flag. Sucker flag positions on the right side of the green often leave victims further right and below the hole to pitch back up a 10-15 foot embankment. More often than not, the subsequent pitch lacks sufficient height and rolls to the far left side of the green or beyond. Once you find the green, the battle is only half begun as you face putting on one of the course’s harder and faster greens.
If the round left you out of breath and gasping for more, head back up the hill to the first tee, strap yourself in, and take off again as no two rides are ever the same on this roller coaster of a golf course.
Bridgeview Golf Course and Learning Center is located at [where: 2738 Agler Road, Columbus, Ohio] and is 5 minutes from Easton and just 10 minutes from Downtown.
614 471-1565
One reply on “Bridgeview Golf Course Review, Columbus, Ohio”
[…] Bridgeview Golf Course Review […]